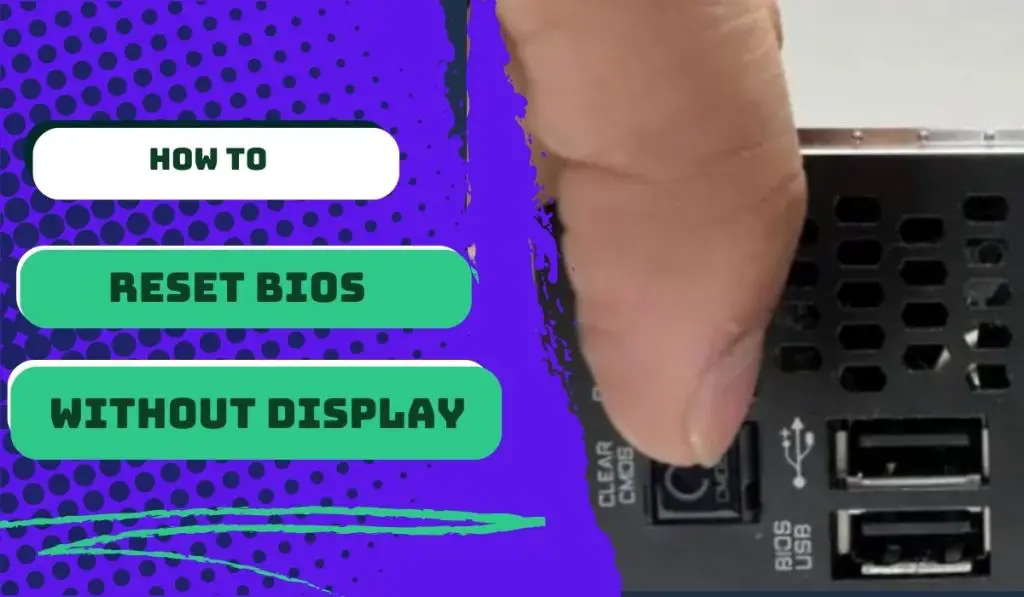
There are two ways to reset BIOS without display. By using the Clear CMOS button or removing the CMOS battery. Press and hold the Clear CMOS button for 10–15 seconds, then release the button and reconnect the power cord. OR. Gently remove the CMOS battery from its socket and wait for 30–60 seconds before replacing it.
I was working on my MSI motherboard late one night, trying to overclock my CPU. I had made a few changes to the BIOS settings, but when I tried to reboot my computer, it wouldn’t boot up. I tried everything I could think of, but nothing worked. Then I remembered that I could reset BIOS without display.
I turned off my computer and unplugged the power cord. Then I opened the computer case and located the JBAT1 jumper on the motherboard. I moved the jumper to the CLR position and waited for 10 seconds. Then I moved the jumper back to the original position and closed the computer case.
I plugged the power cord back in and turned on my computer. This time, it booted up normally. I was able to go into the BIOS and reset the settings to default. After that, my computer was working perfectly again.
I was so relieved that I was able to reset the BIOS without the display. So in this article, I will be sharing the step-by-step procedure for how you can reset BIOS without display. Keep reading.
There are two major ways to reset the BIOS without display:
- Using the Clear CMOS button: Most motherboards have a Clear CMOS button that you can use to reset the BIOS to factory default settings. This button is usually located near the CMOS battery. To reset the BIOS using the Clear CMOS button, simply press and hold the button for 10–15 seconds.
- Removing the CMOS battery: Another way to reset the BIOS is to remove the CMOS battery. This will erase all of the BIOS settings, including the time and date. To remove the CMOS battery, locate it on the motherboard and gently remove it from its socket. Wait for 30–60 seconds, then replace the battery in its socket.
How to Reset BIOS Without Display on ASUS Motherboards
Here’s a step-by-step guide to reset the BIOS on an ASUS motherboard without a display:
- Turn off your computer and unplug the power cord.
- Open the computer case.
- Locate the CLR_CMOS button on your motherboard. This is usually a small button located near the CMOS battery.
- Press and hold the CLR_CMOS button for 10–15 seconds.
- Release the button and close the computer case.
- Reconnect the power cord and turn on your computer. Press and hold the delete key or F2 key to enter the BIOS to reset.
This guide should work for most ASUS motherboards, but there may be some exceptions. If you are unsure whether or not this guide will work for your motherboard, please consult your motherboard manual.
How to Reset BIOS Without Display on MSI Motherboards
Here is a step-by-step guide to reset the BIOS without a display on MSI motherboards:
- Turn off your computer and unplug the power cord.
- Open the computer case.
- Locate the JBAT1 jumper on the motherboard. This jumper is usually located near the CMOS battery.
- Move the jumper to the CLR position.
- Wait for 10 seconds.
- Move the jumper back to the original position.
- Close the computer case.
- Plug the power cord back in and turn on your computer.
How to Reset BIOS Without Display on Gigabyte Motherboards
Here are the steps involved in resetting BIOS without display on Gigabyte motherboards:
- Locate the Clear CMOS button. This button can be located either on the rear I/O panel or on the system board. If you are unsure where the button is located, consult your motherboard manual.
- Properly shut down your PC. If you are having problems booting up your PC, hold down the power button for at least 10 seconds to force shut it down.
- Unplug the power cord from the power supply.
- Press the Clear CMOS button.
If your Clear CMOS button is located on the system board,
- Open the PC case.
- Locate the Clear CMOS button. This button is usually labeled as “CLEAR CMOS” or “CMOS_SW.”
- Press the Clear CMOS button.
Once you have pressed the Clear CMOS button,
- Close the PC case (if necessary).
- Plug the power cord back into the power supply.
- Turn on your PC.
- Press the BIOS key (usually the Delete key) to enter the BIOS Setup screen.
- In the BIOS Setup screen, find the dedicated section to load optimized defaults. This is usually present under Save & Exit.
- Load the optimized defaults and save your changes.
- Reboot your PC.
The BIOS reset is now complete.
Please note that the specific steps may vary depending on the model of your Gigabyte motherboard. Please consult your motherboard manual for the exact steps to reset the BIOS.
Safety precautions
Before you reset the BIOS, it is important to take the following safety precautions:
- Turn off your computer and unplug the power cord.
- If you are using the Clear CMOS button, make sure to press and hold the button for the full 10–15 seconds.
- If you are removing the CMOS battery, be careful not to damage the motherboard.
- Once you have reset the BIOS, make sure to reconnect the power cord and turn on your computer.
Once you have reset the BIOS, you may need to reconfigure some settings, such as the boot order. If you are unsure how to reset the BIOS or reconfigure your settings, please consult your motherboard manual or contact the manufacturer for assistance.
Why You Need to Reset the BIOS
BIOS stands for Basic Input/Output System. It is a firmware program that is stored on a chip on your motherboard. The BIOS is responsible for initializing your computer’s hardware and starting up the operating system.
You may need to reset the BIOS if you are having problems with your computer, such as:
- Overclocking gone wrong: If you have overclocked your CPU or RAM and your computer is no longer booting up properly, you may need to reset the BIOS to factory default settings to get it working again.
- Incorrect BIOS settings: If you have changed some BIOS settings and your computer is no longer working properly, you can try resetting the BIOS to default settings to see if that fixes the problem.
- Corrupted BIOS: If the BIOS has become corrupted, it may cause your computer to not boot up properly or to crash frequently. Resetting the BIOS can sometimes fix this problem.
- Hardware failure: If you have recently installed new hardware and your computer is no longer working properly, it is possible that the new hardware is not compatible with your motherboard. Resetting the BIOS can sometimes fix this problem, but if it doesn’t, you may need to remove the new hardware and try something else.
- Strange error messages This could also be due to a corrupted BIOS setting or a hardware failure.
You will need to reset the BIOS without display if you are unable to see the BIOS screen. This can happen if your monitor is not working or if you have changed the BIOS settings so that the display is disabled.
Conclusion
BIOS reset is a troubleshooting procedure that can be used to resolve a variety of computer problems, such as a computer that is not booting up properly, strange error messages, or overclocking instability. The steps for resetting the BIOS will vary depending on the brand and model of your motherboard. It is important to follow the correct steps for your specific motherboard to avoid damaging your hardware.
Resetting the BIOS can be a risky procedure if not done correctly. If you do not follow the correct steps, you may damage your hardware, erase all of your BIOS settings, including the time and date, or make your computer unbootable.
Resetting the BIOS can be a helpful troubleshooting procedure, but following the correct steps for your specific motherboard is important. If you are unsure how to reset your motherboard’s BIOS, please consult your motherboard manual or contact the manufacturer for assistance.


![How to Add More SATA Ports to Motherboard? [Guide] 12 How to Add More SATA Ports to Motherboard](https://bestofmotherboard.com/wp-content/uploads/2022/02/How-to-Add-More-SATA-Ports-to-Motherboard.jpg)
![How To Install Motherboard Drivers With USB? [Guide] 13 How To Install Motherboard Drivers With USB](https://bestofmotherboard.com/wp-content/uploads/2022/02/How-To-Install-Motherboard-Drivers-With-USB.jpg)