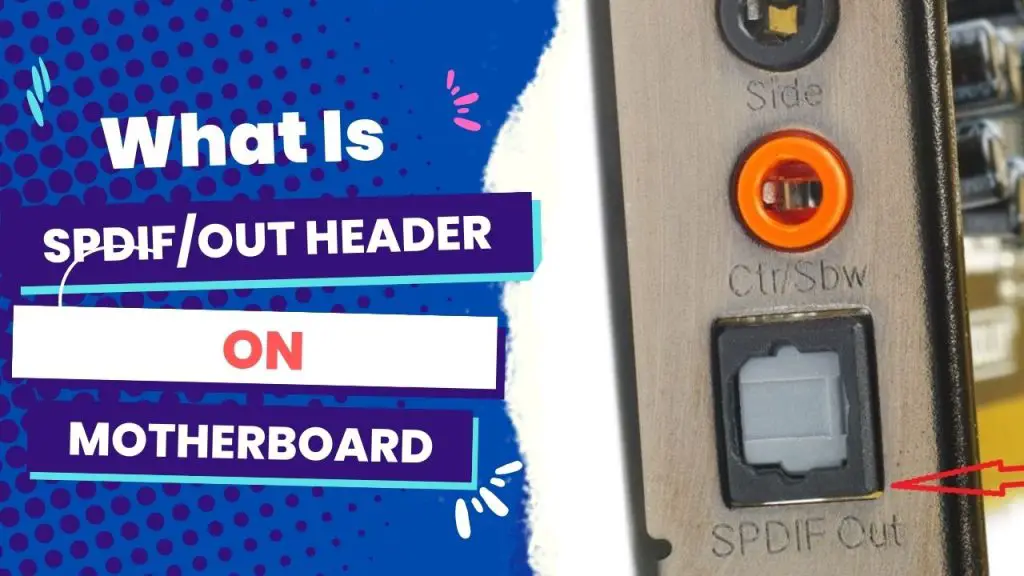
The SPDIF/OUT header on a motherboard is a connection point for a S/PDIF (Sony/Philips Digital Interface) audio cable. This header lets the motherboard send high-quality digital audio to an external audio device, like a home theater receiver or a digital sound system.
In other words, S/PDIF means digital audio. So if you had an audio system with S/PDIF inputs, you could use those headers on your motherboard to run your computer’s audio to the audio system without converting to analog first.
In the rest of this post, I’m going to tell you in more detail about the SPDIF/OUT header and its role in delivering high-quality digital audio. You’ll find additional information on the different types of SPDIF connectors, their relevance over HDMI, and how to properly set up a SPDIF connection.
First of all, do you even need this header connection to build your PC?
Do you need the SPDIF/out header?
The SPDIF/out header is for S/PDIF audio output, but do you really need it to build your PC? Well, most motherboards have optical S/PDIF output. So if you have an audio system that takes S/PDIF input, then this header would come in handy.
You may be wondering, “What about the front panel audio?” The front panel audio on the case actually uses the internal front panel audio header.
So S/PDIF optical or coaxial interfaces allow direct digital audio to be sent from the PC to the amplifier or speaker without any electromagnetic interruptions.
You will find this optical S/PDIF port on most high-end motherboards as part of their six audio ports. But I have worked on lower-end motherboards with the S/PDIF header instead.
The bottom line is that the S/PDIF header would have been important if we were in the home audio world. But in recent times, HDMI has proven to be a good replacement.
However, you’d like to connect either to a DAC or an HTR, and your motherboard has, for instance, a 5-pin S/PDIF output connector. You may be wondering if the outputs are mainly for graphics cards or whether you should get a bracket or T-module to get the signal out of the computer case.
Well, a quick search on Google for “ttl SPDIF” will present you with a truckload of simple converter circuits, ranging from buffered, transformer-isolated interfaces to simple 2 resistor and 1 capacitor voltage dividers.
But in such a situation, you’d first want to know how to use this digital output, which leads us to the next section.
How does the S/PDIF interface work?
Since the S/PDIF interface transmits digital audio between audio equipment and home theater systems in a compressed form, it can use either a coaxial cable or a fiber optic cable for the transmission.
DVD players and CD players are common pieces of equipment that use this interface, as they connect home theater systems for DTS surround sound, but you can also find this connector in high-quality sound cards and laptops.
So how do you use this digital output on your motherboard, especially if you’re looking to use it for two channels?
First, check your motherboard manual to see if the pinout for the SPDIF header is listed, as it is common to have to move the pins on the connector from the bracket to match your sound card or motherboard. But you’d most likely have to buy or build a bracket, then connect it to the GND and OUT pins, and voila!
I wouldn’t connect an RCA connector directly to the jack if I were you. While this might work, there is a high chance that you will damage the downstream equipment. This is more likely to happen if the SPDIF interface is low-quality. And again, the signal from the header is 0V/+5V while the coaxial SPDIF signal is 0.5V/+0.5V, so you will need a level shifter.
Let me also add that the signal on your MB is designed only to convey the signal inside the computer and not drive various external loads. So it is possible that the different combinations of cable lengths and SPDIF receivers on the other end do not work.
How do you use SPDIF digital audio?
Another thing we need to talk about is how you can connect digital audio from your PC to an AV receiver.
Using one Digital Audio Out Connector at a time, take the connector on the back panel of your PC and connect it to the Digital Input (SPDIF) on your AV receiver or digital audio system.
After doing that, choose the AV receiver input and then adjust the volume using the AV receiver.
Can you disable digital audio SPDIF?
Yes, you can disable digital audio SPDIF from your motherboard, and it is done from the contextual menu. First, right-click on the S/PDIF icon, which is displayed as “S/PDIF” or “S/PDIF Output,” and then select “Disable.”
Meanwhile, depending on your motherboard or sound card, the S/PDIF option may appear with a different label. For instance, some motherboards have it as “Realtek Digital Output.” It all means the same thing.
Wrapping up
Nowadays, the S/PDIF header and connector are replaced by the HDMU. The significant motherboard difference between these two connectors on motherboards is that HDMI can pass higher-resolution audio, including the formats found on Blu-ray: Dolby TrueHD and DTS HD Master Audio.
I would also go for the HDMI connection for simple video signal transmission. It is not even up for debate because HDMI is far more capable than any SPDIF connection.
But if you have been wondering what the SPDIF/out header is for on your motherboard and its relevance, then I hope you found this article helpful.


![What Are Motherboard Standoffs? [Guide] 4 What Are Motherboard Standoffs](https://bestofmotherboard.com/wp-content/uploads/2022/01/What-Are-Motherboard-Standoffs.jpg)
![Does it Matter Which PCIe x16 slot I Use? [Guide] 5 Does it Matter Which PCIe x16 slot I Use](https://bestofmotherboard.com/wp-content/uploads/2022/01/Does-it-Matter-Which-PCIe-x16-slot-I-Use.jpg)