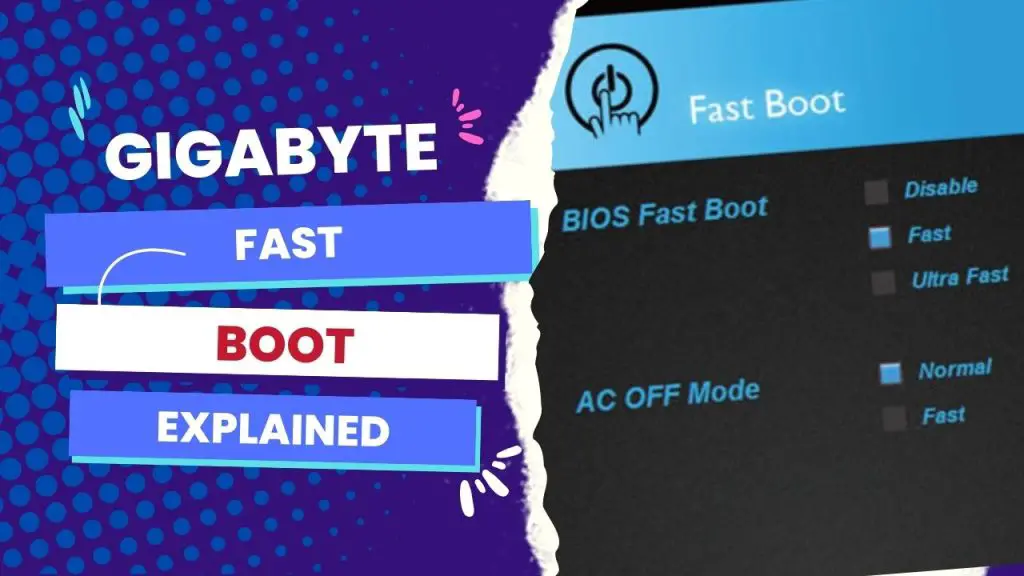
Gigabyte Fast Boot is a BIOS feature in the Gigabyte App Center that reduces your computer’s boot time by skipping some of the hardware initialization steps during startup. All you need to do to have this feature on your PC is to go to the Gigabyte Website, download the Gigabyte App utility, and from the software, you can access the Gigabyte Fast boot.
If you tired of waiting for your PC to start up and it feels like it takes an eternity to get going? We know how frustrating it can be to sit and wait for your computer to finally come to life. That’s why we want to introduce you to Gigabyte Fast Boot. This software can significantly reduce the time it takes for your PC to start up and get you to your desktop faster.
But before you jump in and enable Gigabyte Fast Boot, it’s essential to be aware of the potential compatibility issues that may arise. You want to ensure that your hardware and operating system are compatible, and certain USB devices may not be detected.
Additionally, if you have overclocked your system, it may cause instability, and BIOS updates may also impact its performance. However, don’t let these potential issues discourage you from using Gigabyte Fast Boot. By carefully considering these conditions, you can avoid any problems and start enjoying faster boot times. So, let’s dive into how you can get started with Gigabyte Fast Boot and make the most out of this software.
What is Fast Boot in Gigabyte BIOS?
Fast boot is a feature in Gigabyte BIOS that enables the system to skip specific tests and processes during the boot-up sequence, allowing for a faster boot time. This feature can be handy if you frequently turn your systems on and off and want to minimize the time it takes to start up.
Pros and Cons Of Enabling Gigabyte Fast Boot?
Gigabyte Fast Boot is a feature that can significantly reduce the boot time of your computer. It does this by disabling the POST (Power-On Self-Test) screen, which is a diagnostic test that your computer runs when it first starts up. This can save you several seconds each time you start your computer, which can add up over time.
Here are the pros and cons of enabling Gigabyte Fast Boot:
Pros:
- Shorter boot times
- Less wear and tear on your hardware
- Improved security (less time for malware to load)
Cons:
- You can’t access the BIOS or UEFI settings when Fast Boot is enabled
- Some hardware features may not be available when Fast Boot is enabled
- Fast Boot may not be compatible with all operating systems
Enabling fast boot on a Gigabyte BIOS can reduce boot times by skipping certain system checks and processes. This can be beneficial if you frequently restart your computer or need to boot it up quickly.
However, it can also have drawbacks, such as preventing you from identifying and troubleshooting hardware issues during startup and making it challenging to access BIOS settings.
My first-hand experience of this was when I enabled fast boot on my Gigabyte GA-Z170X-Gaming 7 motherboard to reduce boot times, but I had to troubleshoot issues that sprouted from a few of my USB devices.
So, whether you enable fast boot or not depends on your specific needs and use case. For example, it can be a good option if you value fast boot times and don’t need to access BIOS frequently.
However, if you need to troubleshoot hardware issues or access BIOS frequently, you may consider better choices than a fast boot.
How Do You turn ON/OFF fast boot on Gigabyte?
To enable or disable fast boot on a Gigabyte motherboard, follow these steps:
Step 1: Restart your computer and enter BIOS by pressing the key designated for your motherboard model (The BIOS key for popular PC models can vary, but there are common keys.
HP laptops use “F10”, and desktops use “F1”, “F2”, or “Del.” Dell models use “F2”, “F12”, “F8”, or “Del.”
Lenovo laptops use “F1”, and desktops use “F1”, “F2”, or “Enter.”
Acer models use “F2”, “F10”, “Del,” or “Ctrl+Alt+Esc.”
ASUS models use “F2”, “Del”, “F8”, or “Esc”.
MSI models use “Del”, “F2”, “F11”, or “F12”.)
Step 2: Navigate to the “Advanced” tab using the arrow keys on your keyboard.
Step 3: Scroll down to “Fast Boot” and use the arrow keys to select “Disabled.”
Step 4: Press F10 to save your changes and exit BIOS.
Step 5: Your computer will boot up normally without skipping system checks or processes.
Meanwhile, you can turn on/off fast boot using Gigabyte’s EasyTune software without turning off your PC. To do so, launch EasyTune, navigate to the “Smart Quick Boost” tab, and disable the “Fast Boot” option.
Gigabyte Fast Boot vs Ultra Fast Boot: What’s the Difference?
The main factor differentiating Gigabyte fast boot from Ultra fast boot is the optimization level and system checks they bypass during boot-up. As a result, the ultra-fast boot can be significantly quicker than the fast boot, but it may cause hardware detection and compatibility issues.
Gigabyte fast boot skips some system checks and processes during startup to reduce boot times. In contrast, ultra-fast boot optimizes the boot process by bypassing some firmware checks and launching only a few essential devices, just like when I found out that ultra-fast boot caused issues with my USB devices and Ethernet connectivity.
Contrarily, fast boot significantly improved boot times without causing any hardware issues.
I won’t recommend you use Ultra-fast boot because if you need to change anything in the BIOS, this setting won’t allow you to press the DEL key during boot to enter the UEFI bios setup. So in that regard, Fast Boot is the best option.
And the latter only works with Windows 8/8.1 and 10 while you have compatibility settings off.
Overall, the best option depends on your specific needs and hardware configuration. For example, the ultra-fast boot may be the best option if you need the fastest possible boot times and don’t encounter hardware issues.
However, a fast boot may be the better choice if you encounter hardware issues or need a more stable boot process.
Gigabyte Fast Boot App download
To use the Gigabyte Fast Boot app, you must first download and install it from the Gigabyte website or included driver disc. You can download the Gigabyte Fast boot utility and access it from the Gigabyte APP center. As mentioned, this APP Center provides you with all the knowledge levels and easy access to the system utility tools, categorized into downloadable modules.
You can download the latest version of Gigabyte Fast Boot (20.0420.1) on FileHorse, as long as you use Windows 10 (64-bit). Remember that you must install the APP Center before installing the Fast Boot utility.
Once installed, you can access the app from the Gigabyte App Center or by clicking the Fast Boot icon on your desktop.
In the app, you can do the following:
- Select which features to enable or disable during the boot-up process, thereby speeding up your system’s startup.
- Customize the boot order
- Select the boot device priority
- Set a timer for the app to launch when your system starts automatically.
How to get into BIOS after setting up Gigabyte ultra fast boot?
Another essential thing to worry about after setting up Gigabyte Ultra fast boot is how to get into BIOS. The popular way people get around this is by popping out the CMOS battery. But you don’t have to.
You can follow this navigation If you’re using Windows 8, 8.1, or 10:
Settings -> Update and Security -> Recovery -> Advanced Setup (press the Restart button) -> Troubleshoot -> Advanced Options -> UEFI Firmware Settings.
If this Windows 10 Recovery boot does not present the UEFI option for you, there’s another way, which is to Install Gigabytes APP Center + Fast Boot software that I’ve shared above.
This utility will allow you to boot into BIOS or set the Boot type back to Normal or Fast Boot.
Is the Gigabyte fast boot not working?
The Gigabyte fast boot not working can be caused by several factors, including outdated BIOS versions, incompatible hardware, and conflicting software.
The usual fix is to update your BIOS. But before going that length, try disconnecting any unnecessary hardware and disabling any conflicting software.
If all else fails, try turning it off and on again.
Conclusion
Gigabyte Fast Boot is a BIOS option that allows the system to bypass some hardware initialization stages at startup, lowering boot time.
While it can be useful for people who frequently restart their computers or need to boot them up quickly, it can also cause compatibility and stability issues. Enabling Fast Boot also makes accessing BIOS options and troubleshooting hardware faults during startup more difficult.
The Ultra-fast boot may provide faster boot times but could cause hardware detection and compatibility issues, and Fast Boot may be the better choice for those who encounter hardware issues or need a more stable boot process. Finally, whether or not to enable Fast Boot is determined by your individual requirements.
Remember, sometimes even technology needs a good old-fashioned reboot! 😉
So which one do you prefer between the two? Please let us know in the comment section.


