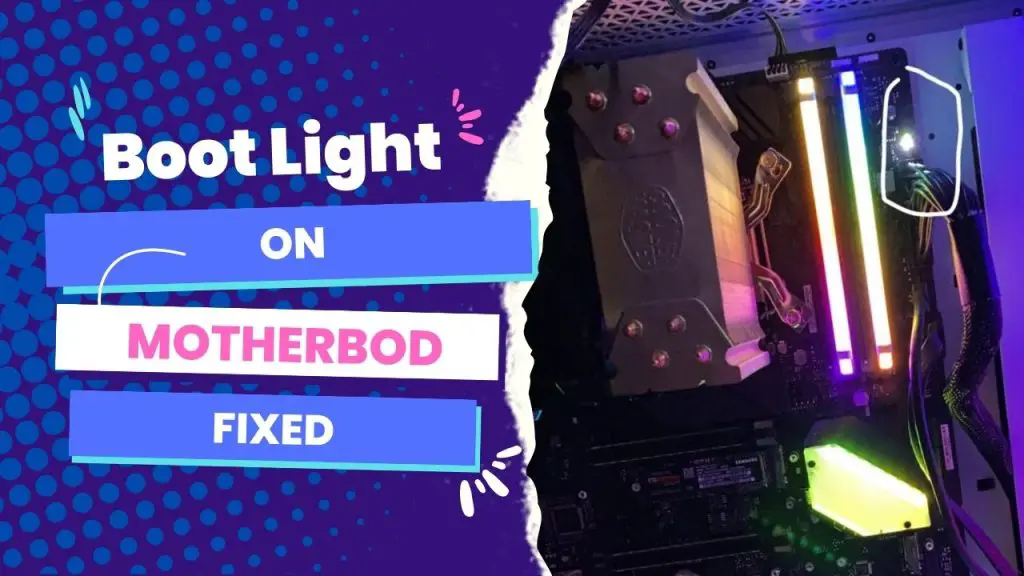
The boot light on your motherboard means that there’s a problem with your boot drive (HDD or SSD). In other words, your motherboard reached the point where it tried booting into Windows off of your boot drive and failed.
Perhaps you were starting your computer, and it then got stuck on the boot light after cycling through (and perhaps with no display). In this situation, the light is from the LED-labeled boot.
Does this sound familiar? It means you’ve got a boot light problem. Now, the color of the light could be green or red, depending on your motherboard’s make and model. The point is that the light on the boot indicator means something is wrong with the boot device, which would be the hard drive where the OS is stored.
The first time I had to deal with this issue, as I can recall, was with my X570-F gaming. In this article, I’m going to share with you the various possible fixes to the boot light on the motherboard and how to achieve a successful POST.
Before we dive into that, let’s run through the possible causes for this code light, as they vary per motherboard brand and model, and also determine what troubleshooting approach will work for your situation.
The most common cause of the boot light on the motherboard
When you see the boot light on your motherboard, it means that the boot did not happen yet and your operating system has not been successfully loaded yet.
The most likely reason could be traced to your BIOS settings, but there could also be problems with your hard drive or the OS on it.
For instance, in my case, I eventually figured out that my BIOS had been set to a different boot drive, and so it tried to boot from a different disk that was not my operating system’s hard drive.
But that is not the only situation. In some cases, it could be that something has flawed the installation of Windows.
There are various ways to fix these, but the irreparable one is when the boot drive is dead.
In such a situation, the boot light will always come on, and you will have to buy a new drive and replace the bad one to solve the problem.
but that’s not often the case. So before jumping the gun, it is best to try all the troubleshooting tips possible to see if the boot light will disappear.
Fixes for the boot light on the motherboard
If the boot LED on your motherboard starts blinking, it points to a problem with the HDD or SSD.
The diode has a relationship with the status of your main storage device, where your operating system is installed.
Here’s how you can solve problems relating to the boot light:
Solution 1: Do you have an operating system installed? The diode for the boot LED may be blinking because of this. It is a common issue when you have just assembled your PC.
But if that’s not the case, then be sure that your boot drive is firmly connected and set as the primary boot drive in your BIOS setup.
Solution 2: If the problem continues, then it could be that your boot drive is dead or has been corrupted. It means you need to reinstall your OS or replace it altogether.
Solution 3: To eliminate issues coming from the SATA HDD and SSD, ensure the power cables are plugged in and the SATA port in use is not disabled.
Solution 4: To eliminate possible issues coming from the M.2 SSD, check that your motherboard is compatible with the type of M.2 drive and interface protocol you’re trying to use. Information on this support is usually in your manual.
Solution 5: If the boot light persists, then you can consider resetting the BIOS by clearing the CMOS or resetting the appropriate jumper.
You can even reset the BIOS by loading the default values within the BIOS itself. This will reset all CPU and RAM settings to their factory defaults, which will likely reset everything to normal.
Green boot light on the motherboard No POST
If you have a green boot light on your motherboard but are experiencing a “No POST” (Power-On Self-Test) situation where the system doesn’t proceed with the boot process, it indicates that there might be an issue preventing the system from completing the initial startup checks. Here’s an explanation of possible causes, the types of motherboards it can happen on, and troubleshooting steps:
Why it happens:
- Hardware configuration issues: Improperly seated or incompatible hardware components, such as RAM modules, CPU, or graphics card, can lead to a “No POST” situation.
- Power supply problems: Insufficient power supply, faulty power connectors, or a defective power supply unit (PSU) can prevent the system from booting properly.
- BIOS or firmware issues: Outdated or corrupted BIOS firmware can cause boot failures and prevent the system from progressing past the initial POST stage.
- Faulty motherboard or components: A defective motherboard or malfunctioning components can also contribute to a “No POST” situation.
Troubleshooting and fixes:
- Check hardware connections: Ensure that all hardware components, including RAM, CPU, and graphics card, are properly seated in their respective slots. Re-seat any loose connections and verify compatibility between the components and the motherboard.
- Test with minimal configuration: Remove unnecessary components, leaving only the essential hardware (CPU, one RAM module, and GPU if necessary) connected. Attempt to boot the system with this minimal configuration to isolate potential issues.
- Verify power supply: Ensure that the power supply is providing adequate power to the system. Double-check all power connections, including the 24-pin motherboard power connector and the 4/8-pin CPU power connector. Test the system with a known working power supply if possible.
- Clear CMOS: Reset the BIOS settings to default by clearing the CMOS. Refer to the motherboard’s manual for instructions on how to perform this reset.
- Update BIOS: If possible, update the motherboard’s BIOS firmware to the latest version. Check the manufacturer’s website for BIOS updates and follow their instructions for updating the BIOS.
- Test components individually: If you have spare components available, such as RAM modules or a different CPU, try swapping them out one at a time to identify potential faulty components.
- Professional assistance: If you have exhausted the above troubleshooting steps and the issue persists, it may be best to seek assistance from technical support or a qualified computer technician who can perform more in-depth diagnostics on your system.
Red light On Motherboard
A red boot light on a motherboard indicates that there is a problem with the boot process. This can happen for a variety of reasons, including:
- A problem with the CPU
- A problem with the RAM
- A problem with the hard drive or SSD
- A problem with the motherboard itself
- A problem with the power supply
If you see a red boot light on your motherboard, the first thing you should do is check the connections to the CPU, RAM, hard drive, and power supply. Make sure that all of the cables are properly plugged in and that the components are properly seated.
If the connections are all correct, you can try resetting the BIOS. To do this, you will need to access the BIOS setup screen. The exact procedure for doing this will vary depending on your motherboard model. Once you have accessed the BIOS setup screen, look for the option to reset the BIOS settings to default.
If you have tried all of the above and you are still seeing a red boot light, you may need to replace the CPU, RAM, hard drive, or motherboard. You can also try contacting the manufacturer of your computer for assistance.
The red boot light can occur on any motherboard, but it is most common on motherboards that have a built-in POST (Power-On Self-Test) function. The POST function checks the hardware components of the computer to make sure that they are working properly. If the POST function fails, the red boot light will turn on.
To troubleshoot a red boot light
You can use the following steps:
- Check the connections to the CPU, RAM, hard drive, and power supply. Make sure that all of the cables are properly plugged in and that the components are properly seated.
- Reset the BIOS. To do this, you will need to access the BIOS setup screen. The exact procedure for doing this will vary depending on your motherboard model. Once you have accessed the BIOS setup screen, look for the option to reset the BIOS settings to default.
- Test the CPU, RAM, hard drive, and power supply. You can do this by using a spare component or by taking the computer to a repair shop.
- Replace the motherboard. If you have tried all of the above and you are still seeing a red boot light, you may need to replace the motherboard.
Why is my boot LED light always on after powering on?
If the BOOT LED light on your motherboard is always on after powering on, it still means that no boot device (e.g., HDD or SSD) or boot device is faulty. To troubleshoot this issue, follow these steps:
Start with the easy part: reconnect the SATA cable to the motherboard and the hard disk. Then ensure that the M.2 screw is locked, and also reconnect the M.2 SSD again if it’s installed.
If that doesn’t solve the issue, then inspect your M.2 SSD or M.2 slot on the motherboard to see if there are dirt particles on the gold pins.
If you find any, clean them and try again.
Conclusion
Many people who report boot-light issues on their motherboards have similar stories.
On many occasions, they press the On button on the case, and the motherboard’s boot red light shines up. And even then, when they want to install Windows 10 from USB (just by building the PC), it doesn’t appear in the bios as a selectable option.
You could plug the monitor’s cable into the motherboard instead of the VGA, and that can surprisingly solve your issue.
But again, there’s no one-size-fits-all solution to solving LED code issues on motherboards. So it’s best to try all possible troubleshooting tips before concluding.
But when you realize that the boot light comes on because the boot drive has died, that’s the worst-case scenario because you now have to buy a new drive to replace the bad one and also reinstall Windows, all drivers, and all programs on your computer.


![What Are Motherboard Standoffs? [Guide] 4 What Are Motherboard Standoffs](https://bestofmotherboard.com/wp-content/uploads/2022/01/What-Are-Motherboard-Standoffs.jpg)
![Does it Matter Which PCIe x16 slot I Use? [Guide] 5 Does it Matter Which PCIe x16 slot I Use](https://bestofmotherboard.com/wp-content/uploads/2022/01/Does-it-Matter-Which-PCIe-x16-slot-I-Use.jpg)