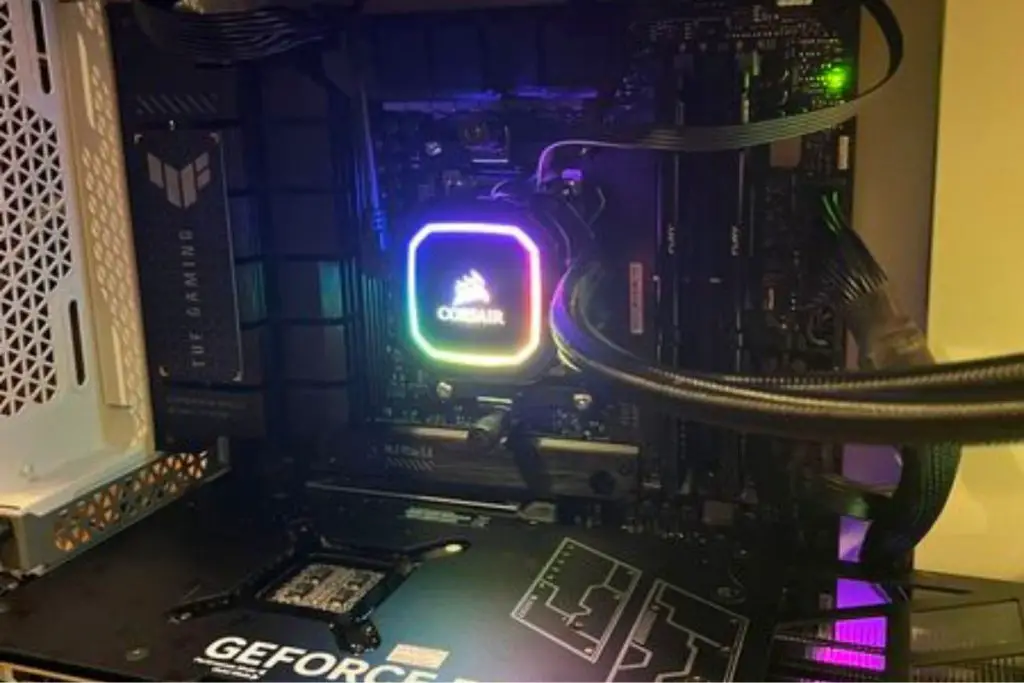
A green light on the motherboard indicates that it is receiving power from the power supply; on most motherboards, this light is usually located near the power connector. However, it does not guarantee that the motherboard is functioning properly, as other components could prevent the system from booting up.
If you have just finished your build and connected the GPU to the monitor via HDMI, When you turn on your computer, the motherboard will cycle through the LED lights for DRAM, CPU, VGA, and BOOT.
At this point, the green light on any of the LED labels remains on, and your motherboard refuses to boot properly.
It’s a common issue among PC users, regardless of the motherboard brand. You may have checked all power connections and tried booting up with no RAM sticks or just one, but still no luck.
In this post, I’ll explain the significance of the green light on the motherboard, the common causes of this issue, and how to fix it. But first, let me share with you a quick tip that has worked for me in the past and may help you too.

Solutions to the Green LED light on the motherboard No POST
Step 1: Reinstall the M.2 SSD
Are you using an M.2 SSD as a boot drive? If yes, then consider reinstalling it and making sure it is properly fitted with an M.2 connector screw.
Improper seating of the M.2 SSD could be the culprit behind the green light on the motherboard.
I also recommend you install the SSD into another M.2 connector if you have more than one on your motherboard to see if that works.
While you do that, don’t forget that dirt may be on the M.2 Connector And SSD Pins. So use a soft brush to clean it before installing.
Step 2: Reconnect SATA Cables
Another common solution to the green light problem is to reconnect the SATA cable to your motherboard and SATA drives, respectively, for a proper connection. This should ensure that the connection is secure and that your computer can detect your storage drive.
If reconnecting the cables doesn’t work, you can try switching the SATA ports on your motherboard or using a different SATA cable. This will help you determine whether the problem is related to the cable connection or not.
Another thing to check is the SATA power cable connection to your storage drive. The SATA power cable provides power to your hard drive or SSD from the power supply.
Make sure the SATA power cable is securely connected to your storage drive.
Step 3: Consider switching RAM DIMM slots.
To troubleshoot the issue of a continuous Green LED light, try switching the DIMM slots for your RAM.
If your motherboard has multiple DIMM slots and you have more than one RAM stick, remove all but one and install it in a different slot. Continue changing the slot until the Green LED light stops being continuous.
Ensure that the RAM stick is properly inserted into the DIMM slot and that you hear a clicking sound.
Although the green LED light isn’t typically related to the RAM, many users have resolved this issue by switching their DIMM slots, so it’s worth a shot.
Step 4: Reset BIOS
If you’ve accidentally or mistakenly changed some values in your computer’s BIOS and your computer was working fine before, don’t worry. You can easily restore the default settings and get your computer working again.
There are two ways to do this.
To reset your BIOS, The first method is to remove the CMOS battery. To do this, turn off your computer and remove the side panel of your case. Locate the CMOS battery (it’s different from the BIOS chip) and remove it from its socket for at least a couple of minutes. Let the battery discharge and then put it back in place.
The second method involves shorting the BIOS jumper pins after switching on your computer. This method helps you confirm whether the BIOS is the culprit behind the issue. Once you’ve done this, you can check whether your computer is working properly again.
By resetting your BIOS to its default settings, you can fix many common issues with your computer, including green light errors.
However, if you’re not sure what you’re doing or if you’re uncomfortable working with computer hardware, it’s best to seek the help of a professional to avoid causing further damage to your system.
Solid Green light on Motherboard: What worked for me
If the green light is on and the computer is not booting or there are no other signs of life, there may be other issues with the system. These issues could include a faulty power supply, a defective CPU, faulty RAM, or other hardware problems
It is important that I throw context into my situation, as it may relate to what you are currently experiencing with your motherboard too.
It happened that after building the PC and trying to start it up, I got no display on my monitor but only noticed a green LED next to the BOOT labeled LED.
This means that the motherboard has failed to boot. And unfortunately, many failed POSTs have things to do with RAM and not boot.
I eventually got the BIOS to display on the monitor through the GPU, not the motherboard. I understand that this is not a one-size-fits-all solution, but it’s worth a try.
Since the display was sent through the display port and not the HDMI as my screen is HDMI only, I decided to use the GPU instead and that worked. The BIOS came up on the screen and the green-yellow light is still on.
The bottom line from this attempt, in my case, is that the green light on the BOOT LED on my motherboard was an indication that no operating system was installed.
So this is not always the case for everybody. So I recommend you consider any of the below fixes to solve the green light on your motherboard:
Green Boot Light OnMotherboard MSI
The green boot light on an MSI motherboard indicates that the system is starting up. However, if the light stays on for an extended period, it may indicate a problem with the hardware, such as the RAM or CPU. The common way to troubleshoot is by removing and reseating hardware components and checking for any error codes on the motherboard.
MSI motherboards are equipped with EZ-Debug LEDs. When getting your motherboard, this feature may seem trivial, but it can save you hours when troubleshooting when shit hits the fan (pun intended)
If you are getting a green light on your motherboard and the illumination settles on the boot lid, it is most likely an issue with your M.2 SSD or SATA HDD or SSD.
The first time I had to deal with this issue on an MSI motherboard (Z590-A Pro) was when I took my GPU out to clean the fan and my PC refused to boot afterward and the green light came on.
If you have a familiar situation, I’m going to show you the step-by-step process of how to fix a green boot light on MSI boards. But first, let’s go over the actual solutions that worked for me. That may save you a lot of time.
What worked for me
For context, all the parts of my Z590-A Pro are new. When I tried to boot up the PC, the green boot LED stayed on. According to the MSI motherboard user manual, the indicator points to an issue with the storage.
Here is how I solved it in my case:
Step 1: First, I plugged my keyboard into a USB port behind the motherboard.
Step 2: Then I turned on the PSU (not the whole PC). Only the mother came up, and my keyboard was powered up and connected (to be sure about this, you can use a number lock or caps lock to confirm keyboard power).
Step 3: As I turned on the PC, I began to mash the DEL key (not backspace). But in your case, the key to working will be F2.
Step 4: As I did this, the four LED indicator lights started to go through their normal cycles—from the CPU light to DRAM, VGA, and then the boot light.
Step 5: I allowed the CPU’s LED check-up light to turn on and off to be sure there was no problem with the CPU. Then, IMMEDIATELY after the DRAM (orange light) came up and disappear, I plugged the monitor power cable into the outlet while furiously pressing the DEL (or F2) key
Step 6: With this, I was able to get into the UEFI BIOS and get past the booting problems.
However, each MSI motherboard will have its specific idiosyncrasies. So what worked for me may not give dice to your efforts. If that’s the case, then the next section is for you.
After reaching out to MSI support and combing through threads of solutions reviews for the Green Boot light on MSI motherboards, here’s what you can do to solve your issue:
Solutions to Green boot light on MSI motherboard
The BOOT EZ debug LED on MSI motherboards represents the storage unit of your build. So when you have a problem with a green boot light, the first place to check is whether your storage drive is connected to the motherboard properly—of course, this will depend on what type of storage drive you’re using.
Follow these three steps to solve the green boot light on your MSI board:
Step 1: Allow the EZ Debug LED Settle
During the boot process, the debug LEDs may blink, which is normal. However, if the light remains fixed on a particular LED, it is a cause for concern.
You should wait a few minutes for the light to settle on the problematic component, especially during the first boot.
The LED light can indicate a range of issues, from minor to severe hardware defects that require replacement.
It is natural to be worried, but before initiating a time-consuming RMA process, it is best to rule out any external factors that may be causing the problem.
Step 2: Inspect the M.2 SSD
To ensure the proper functioning of M.2 SSDs, inspect the pins and ensure that they are properly inserted into their slots.
Confirm that the screw has securely locked the SSD in place.
It is important to note that some older motherboards may not support NVMe M.2 devices as boot drives.
To avoid any issues, it is advisable to check your motherboard manual to determine if there are any limitations regarding booting from an M.2 storage device.
Step 3: Inspect SATA SSD/HDD
To troubleshoot storage drives connected via SATA port, start by securely unplugging the SATA cable from both the motherboard and storage unit, and then re-plug it back in.
If that doesn’t solve the issue, try using a different port or replacing the cable.
If the problem persists, it may be necessary to replace the entire storage device.
Keep in mind that certain SATA ports may be disabled depending on the number of PCIe lanes in use by other components.
For instance, if you’re using multiple NVMe M.2 SSDs, SATA ports 5 and 6 are typically disabled. It’s advisable to refer to the motherboard manual to confirm if this is the case.
Remember to exercise caution while handling the hardware to avoid any potential damage or injury. By following these steps, you can potentially resolve issues with your SATA-connected storage devices.
FAQ
What does the boot light on an MSI motherboard mean?
The most common reason you get a boot light on an MSI motherboard is that an
issue has developed with your storage drive. But sometimes, it could mean that your operating system has failed to load. The latter could be due to issues with BIOS settings, the hard drive, or the installed OS. Hardware or software problems are also possible culprits for the error.
What does the BIOS flashback green LED on my motherboard mean?
The BIOS flashback green LED on a motherboard indicates that the motherboard’s BIOS firmware can be updated or restored to an earlier version using a USB flash drive. This feature is helpful when the BIOS firmware is corrupted and the system is unable to boot up or function correctly.
How do I turn off the RGB lights on my MSI motherboard?
To turn off the RGB lights on your MSI motherboard, you can access the MSI Mystic Light software and select the “Off” option for the lighting control. Alternatively, you can disable the RGB lights through the BIOS settings by selecting the “Advanced” tab, then “Integrated Peripherals,” and finally “RGB Fusion.” From there, you can choose to disable the lighting feature.
Finally
A green light can mean a different thing when it comes to your motherboard. You need to inspect many connection areas along with the components to know where the problem is coming from.
In some motherboards, the green light could mean that the motherboard is receiving power. So the issue to be worried about is when the green light doesn’t come on.
But in many situations, especially for motherboards with LED code interfaces, the green light can shine on any of the four LED labels to indicate where the issue is.
Expect the green light on your motherboard to be traced to a boot problem.
If you tried the troubleshooting tips in the above article, I’d love you to share in the comments which tips exactly worked out for you eventually.


![What Are Motherboard Standoffs? [Guide] 5 What Are Motherboard Standoffs](https://bestofmotherboard.com/wp-content/uploads/2022/01/What-Are-Motherboard-Standoffs.jpg)
![Does it Matter Which PCIe x16 slot I Use? [Guide] 6 Does it Matter Which PCIe x16 slot I Use](https://bestofmotherboard.com/wp-content/uploads/2022/01/Does-it-Matter-Which-PCIe-x16-slot-I-Use.jpg)