If your MSI motherboard won’t boot into Windows, it’s because it can’t find a boot device or can’t find the Windows operating system when it’s trying to boot. Check that the boot device was found correctly, then set up the BIOS booting setup or press F11 to boot from the chosen boot device to fix the problem.
In some advanced situations, you may need to troubleshoot any other USB devices connected to the PC. Failure to follow all these tips may eventually lead to the need to reinstall Windows.
In this article, I’ll hold your hand and walk you through every possible solution to the problem of an MSI motherboard not booting to Windows, from simple fixes to complex ones.
5 Solutions for An MSI Motherboard Not Booting to Windows
The sample case I used for fixing this issue was with my old MSI MAG Z490 Tomahawk motherboard. I had ensured everything was plugged in and noticed my HDDs and SSDs were being recognized, but it just won’t boot up Windows 10.
If this sounds like the situation you’re in, then we are going to look at how you can solve it using the following troubleshooting steps:
- Confirm the boot device recognition.
- Configure BIOS booting setup
- Boot from another selected boot device
- Troubleshoot other USB devices connected to the motherboard.
- Examine the operating system file for damage and reinstall.
1. Confirm boot device recognition
The first thing you can do when your MSI motherboard won’t boot properly to Windows is to check if the boot device can be detected normally. This works for all MSI board models. To do this, follow these steps:
Step 1: Power on the PC and press the Del key continuously to access the BIOS menu.
Step 2: Navigate to Settings, and then click on System Status to check if the boot device has been detected.
Step 3: Check the BIOS booting settings to make sure Boot Option #1 is set to UEFI HARD DISK or HARD DISK.
This leads us to the next possible solution.
2. Configure BIOS booting setup
Many issues with an MSI motherboard, not booting have been traced to an improper priority setting in the BIOS booting setup. To fix this issue, follow these steps:
Step 1: Access your BIOS menu by hitting the Del key continuously after powering on the PC.
Step 2: Select “Boot Mode” from the Boot menu. Here, you choose [Legacy+UEFI] if you use Windows 7 or 8. If you use Windows 10, then choose [UEFI]. Now, check if the motherboard can boot the operating system.
Step 3: You also need to ensure Boot Option #1 is set to [UEFI HARD DISK] or [HARD DISK].
Step 4: Next, select [UEFI Hard Disk Drive BBS Priority] or [Hard Disk Driver BBS Priority].
Now confirm [Boot Option #1] is configured as the boot device.
3. Use F11 to boot from the selected boot device.
Another way you can solve the problem of the MSI motherboard not booting into Windows is to choose a boot device to enter the operating system.
When you power the computer, press the F11 key continuously to access the boot selection, which then allows you to choose a boot device.
If this doesn’t fix the problem, then it could be due to hardware issues, leading us to the next fix.
4. Troubleshoot other USB devices connected to the motherboard.
Consider removing all USB devices connected to the PC before powering on the PC. It may surprise you that the PC enters the Windows environment after this.
This is because during the booting process, the motherboard scans all of the peripherals, parts, and devices, and USB devices plugged in can stall the booting process, preventing it from booting into Windows.
5. Check for damaged operating system files and reinstall.
If none of the above fixes worked, then you should confirm if the operating system file is damaged by cross-testing it with a different boot device.
If it can enter the Windows environment with another boot device, it means the original Windows file is corrupted or damaged, which means you need to reinstall the operating system.
MSI motherboard with no power or display after booting?
Another problem associated with Windows not booting on an MSI motherboard that we also have to talk about is the issue of no power or display on the monitor even after booting.
In many situations, the fan and LED indicators perform normally, but nothing gets displayed on the monitor at all.
If this sounds like your situation, I’m going to show you how you can solve the issue through the following fixes:
- Troubleshooting CPU compatibility
- Inspect the power jumper on the front panel.
- Problem with the hardware component
- Inspect the display screen for
- Use the MSI EZ Debug LED indicator.
- Clear CMOS
1. Troubleshoot CPU compatibility for your MSI motherboard
If your MSI motherboard boots with no display or power, you need to first check the CPU compatibility before doing anything else.
Go to MSI’s official website, use the search ribbon at the top-right corner of the screen to find your MSI system model, download the file, and then click the compatibility of the CPU.
2. Inspect the power jumper on the front panel.
In the event of no display on the MSI motherboard, there are two things to look out for when troubleshooting the power jumper as the possible culprit:
- Is the JFP1 properly connected to the power switch pin of the case?
- Are the front panel cables damaged?
A problem in any of these areas may prevent the system from booting up when you use the power button.
3. Problem with hardware components
If none of the above fixes have solved the no-display issue, then check if the memory sticks are well seated. Also, look at the installation of the graphics card for possible abnormalities. (I recommend you reinsert the graphics card even when you don’t notice anything wrong.)
4. Inspect the display connection.
If the power supply is not well connected to the display, the motherboard will not boot properly. While you double-check that, also inspect the HDMI cable or any video cable to make sure it is well connected to the graphics card and the computer.
I also recommend you replace the video cable and see if that changes the situation.
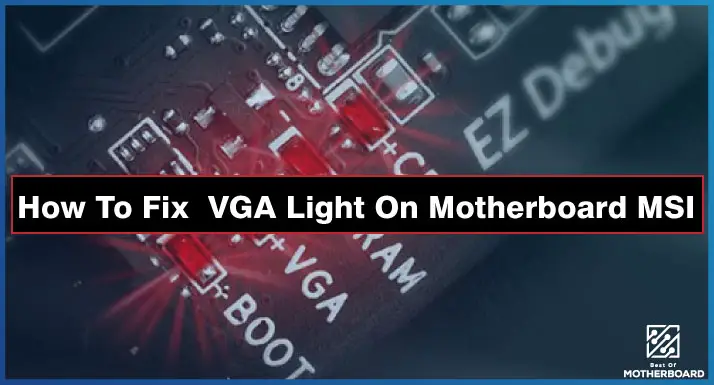
5. Use MSI’s EZ Debug LED indicator.
Luckily, MSI motherboards feature EZ Debug LED indicators that illuminate a static light when there is a hardware-related error while the system boots.
So you can check the debug status of the LED display to easily pinpoint the issue and fix it.
6. Clear CMOS
As with most automated booting processes, once there is an issue with the display of your motherboard, the solution can be a simple battery reset, in this case, the CMOS.
Make sure the power supply is disconnected, and then use a metal object to short-circuit the CMOS jumper, JBAT1.
Alternatively, if you are comfortable with opening the case, you can remove the CMOS battery and hold it out for 5 minutes before reinserting it.
Now try booting the system again and see if it powers on with a display.
The Takeaway
Unlike other computer malfunctions, when an MSI motherboard experiences boot failure, especially in loading Windows, you can’t leave any stone unturned.
More often than not, the issue is fixed by changing the boot order in the BIOS setup and making sure the SSD is first. This works when your MSI motherboard refuses to load Windows and keeps going back to the BIOS screen.
Let me know in the comments which of the above fixes eventually worked for you.


![MSI EZ Debug LED - How To Troubleshoot and Fix[Guide] 4 How to Troubleshoot MSI Debug LED](https://bestofmotherboard.com/wp-content/uploads/2022/02/How-to-Troubleshoot-MSI-Debug-LED.jpg)
![What is Game Boost MSI - [Detailed-Guide] 5 What is Game Boost MSI](https://bestofmotherboard.com/wp-content/uploads/2022/02/What-is-Game-Boost-MSI.jpg)
![[Fixed] MSI Motherboard White Light 6 MSI-Motherboard-White-Light](https://bestofmotherboard.com/wp-content/uploads/2022/10/Asus-Motherboard-White-Light.jpeg)